How To Make Paper Roses ...
a beautiful addition to your cards.
These Paper Roses look gorgeous attached to your cards and here is how to make them in easy to follow steps
Search

Beautiful flowers will always finish a card off to perfection everytime.
To me they are the perfect accompaniment to all your feminine creations, and one I am sure the girls will love.
Buying them can work out to be costly, and so limit the amount of flowers you add.
But there is a way to add these adornments without too much expense, as you will be using the scraps of paper that you have left over from making other cards.
As long as the scrap is large enough to fit the template then I won't throw it away.
If you prefer watching then this video will show you how.. Paper Roses Tutorial
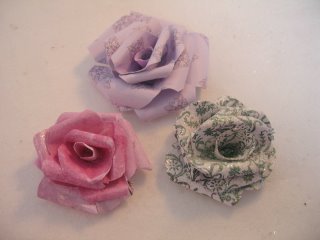
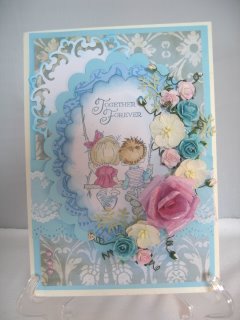
These are the Paper Roses we are going to re-create, and the pink one is on the card at the top.
I have added other flowers around it but the pink one takes centre stage.
So lets get started and make those roses.
Making the Template
You will need some five petalled shapes... but if you don't have something that will produce them, then here is how to make a template for the purpose.
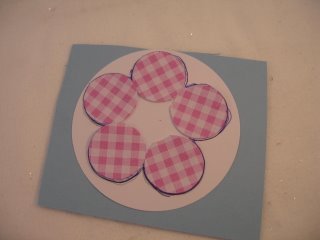
I have used a 3" and cut one circle, and from a 1" punch I have made five smaller circles.
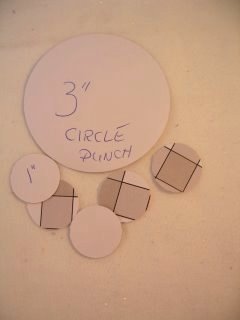
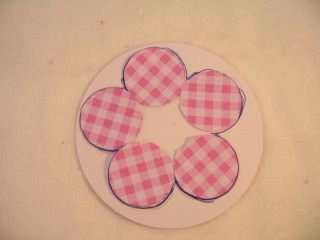
Lay the smaller circles onto the larger one and either draw around the outer edge or cut around it neatly.
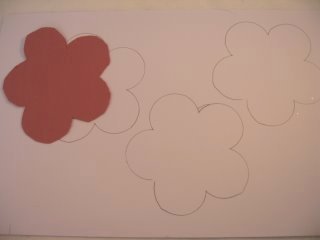
I like to add mine to the top of some stiffer card before I cut around it and this will give me a good Template.
(Once you have this stiff template keep it safe and use it over again, every time you want more roses.)
Making the Paper Roses
Choose the pretty paper, that you want to make your flowers from, and lay it face down.
Draw around your template three times.
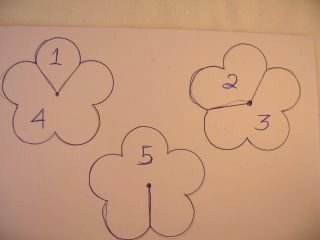
You now need to cut the paper into petal pieces.
The photograph shows you clearly how you need to cut your paper, and this will give you five seperate pieces to make your flowers
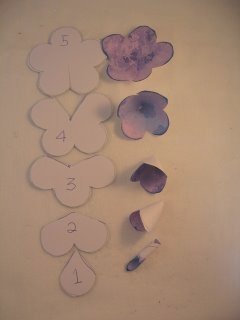
Once you have the pieces it is a good idea to ink the edges as this will define the petals.
But you will need to especially ink the one petal shape on the wrong side as this will show once the flower is made.
Having done that add a little wet glue to one side of each piece and curl it around.
Then give it a second or three to set.
(The photo shows you this step.)
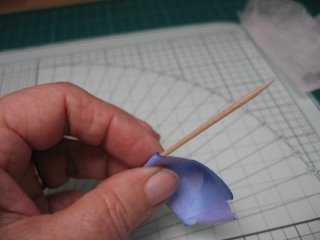
Once the glue is dry curl the edge of each petal around a cocktail stick.
Take care not to rip the paper.
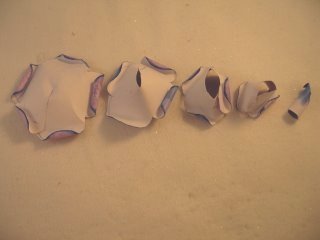
Once you have the five pieces all done then snip the bottom off each one.
(This photo shows you the result you are aiming for.)
Starting with the five petalled shape at the bottom, start to layer the others pieces together.
Use a wet glue, as you don't want the flower to fall apart.
Put some glue into the base of the five petals and add the four petalled shape into the well.
Offset the petals as this gives a more realistic look, and continue until all the pieces are layered together.
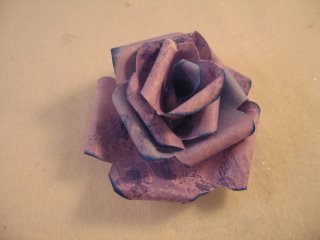
Your flower should look like the one in the photograph.
It does?...oh! well done.
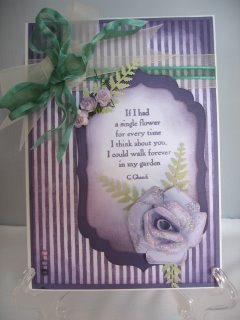
You can make your Paper Roses in any colour you wish and add them in the position on your cards that pleases you.
Dress them up by adding glitter to the petals.
Add some small drops of "Glossy Accents" to them to look like dewdrops.
Or for a really stunning way to finish these beautiful flowers then go to Enamelled Rose Tutorial for step by step instructions on creating this technique for your self.
Return from Paper Roses to Homepage
Search


Recent Articles
-
Memory Book
Oct 15, 22 09:17 AM
Make a memory book, fun to make and even lovelier to give. -
Die cut letters.
Jul 19, 21 10:12 AM
Add that personal touch with die cut letters, add names or sentiment as you please. -
Diaper Fold Card.
Jul 19, 21 09:34 AM
Create this fun Diaper Fold Card...and no need for a pin!
Search


