Birthday wishes
by Brenda
(Selma,NC USA)
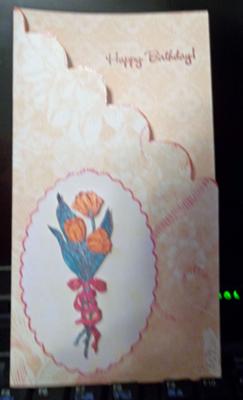
This card took me a lot of time because I couldn't decide how to proceed. I had this sheet of paper (8.5x11") that I REALLY liked, and thought it would make a pretty card.
The first issue is that the print is only on ONE side - the other side was basic white, and I didn't want a basic card! ;o)
After viewing a LOT of card folds, I decided to fold it into thirds. The front third I cut diagonally from the top of the fold about 4" down.
Then dry embossed the design and used the scissors to cut right above the ebossed image. I used a glitter pen to outline the very top of the dry emboss for a little flare.
The third fold I folded over the second - to cover the white side on the inside of the card, and taped down. At this point I was stumped as to how to finish it.
Several weeks passed, my sister came to visit and saw the card. She loved it. That's when I decided it would be a birthday card for her, and I still had a couple of weeks to finish it. Still no ideas - especially keeping in mind that she lives in another state and this would go by mail!
I finally decided on a 3" scalloped oval, which I also used the glitter pen on the edge. Stamped a flower bouquet and colored using glitter pens, cut it out and used foam dots to attach to the oval, which was attached to the card using small foam squares. "Happy Birthday" is stamped on the inside top.
She LOVED the card, so this was a success!
Christina says ...
A very pretty Tri-fold card and I am sure your sister was delighted with her birthday card... even if it stumped you to start with.
There are many folds and ideas in the Projects sections and the Tri-fold has full instructions on how to make it ... including the insert.
And if you are starting to use Spellbinders then there is a tutorial on making this card using them and you will find it in the Spellbinder Series under the name of Double ZigZag Card
Comments for Birthday wishes
|
||
|
||
|
||
|
||

Recent Articles
-
Memory Book
Oct 15, 22 09:17 AM
Make a memory book, fun to make and even lovelier to give. -
Die cut letters.
Jul 19, 21 10:12 AM
Add that personal touch with die cut letters, add names or sentiment as you please. -
Diaper Fold Card.
Jul 19, 21 09:34 AM
Create this fun Diaper Fold Card...and no need for a pin!
Search


