Decorated Notepads
by Lena
(Mumbai, Maharashtra, India)

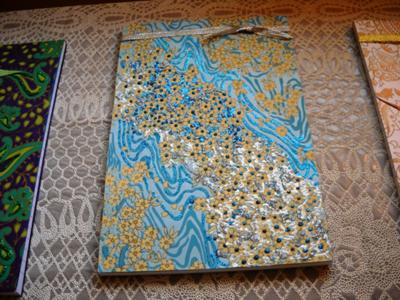
Cherryblossom

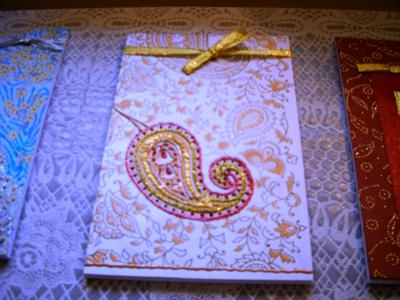
Paisley

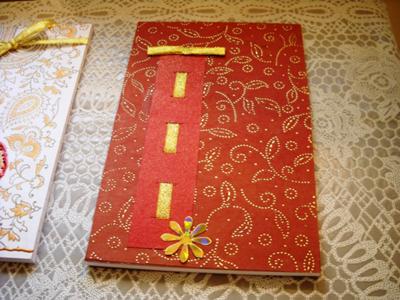
Red Fantasy

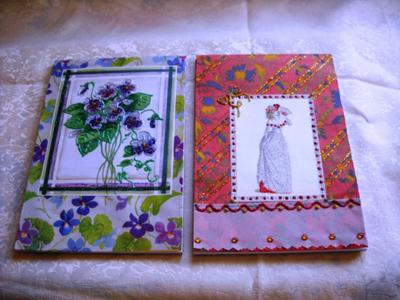
Victorian
Here are some Decorated Notepads I've made.
I am Lena, a wife of 36 years, and mother to two grown children.
My passion is art and craft and you will find me crafting whenever I am not doing housework.
First, I would like to thank Christina for encouraging me to show my art. It is quite simple as you will see.
I have used handmade paper which is a bit expensive, but is vibrant in design. You can use any good quality paper.
These are rule pads with a glossy cover, the kind that flaps over. You will need good quality wrapping paper which is not glossy and not too thin.
Measure the notepad from bottom front, over the spine and back. Cut the decorative paper to size.
Use a good adhesive and spread it over the edges of the pad front and back cover – about half inch border of glue.
Cut the paper, starting bottom front and gently but firmly smooth it over the pad. Leave to dry.
Then the fun part begins.
You take 3D metallic acrylic paints and/or 3D glitter paints and highlight the design on the front of the pad.
Use paints that come in those fine nozzled, plastic bottles. Go over the design as shown in the pictures.
Further use gems or ribbon to make it look pretty.
Either highlight most of the design as shown in “Cherryblossom” or just a part of it as in “Paisley”.
On drying completely, it will give a raised effect and also glitter or shine even more.
For “Red Fantasy”, the work was not too much. The red and gold paper says it all. I took a strip of matching paper, made slots in it with a craft knife and passed stiff gold ribbon through it, ending with a bow.
The bow must be ready to stick on. Then I stuck this strip over the design paper. The gold paper flower (the blue in it is just a reflection of light on the metallic paper) was bought from a craft store.
For the “Violets & Victorian”, I have used colour printouts which I’ve stuck over co-ordinating design paper.
The violets have been highlighted using a darker shade of purple, 3D metallic paint and a lighter shade of green for the leaves and veins.
The centres of the violets are dotted in 3D gold glitter. The purple border is part of the printout but has been lightly glittered in purple i.e., I’ve spread the 3D glitter with a paint brush so as not to give it a raised effect.
The lady’s petticoat and dress neckline have been highlighted in red 3D glitter paint “dots” as also the border around her.
That’s all there is to it. I hope I’ve not forgotten anything.
Lena
Christina says...
Wow! These Notebooks are just beautiful and I am so glad you sent them in for us to see.
Thank you also for the detailed instructions on making these Notebooks, I bet it won't be long before we all have a go at these, I know I will.
And a last thanks for the one you sent to me...it is on my desk and is used daily, and it really is very lovely.


