Diamond Top Cards
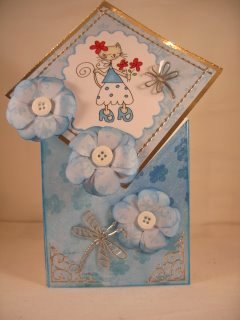
When I first saw these Diamond Top Cards they looked fabulous, but I couldn't figure out how to do them.
I couldn't find plain and simple instructions on what to do, but YOU can .... here!
So here for you is a step by step guide on how to achieve this unusual shaped card for yourself.
As always practise on a cheap piece of card, or paper, until you feel confident to work on your good stuff.
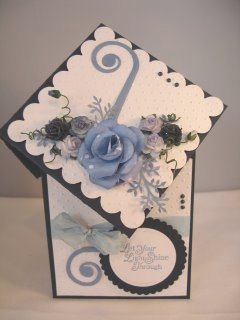
The flowers are made following the instructions for the Retro Punched Flowers.
You may prefer to learn by watching and so you will find a short video tutorial Here.
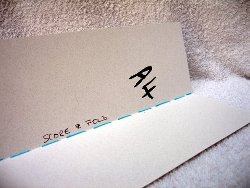
Start of with an A4 card.
(21x30cms approx.)(8 1/2 x 11 3/4 ins)
Fold in half length ways. Open out again and lay flat.
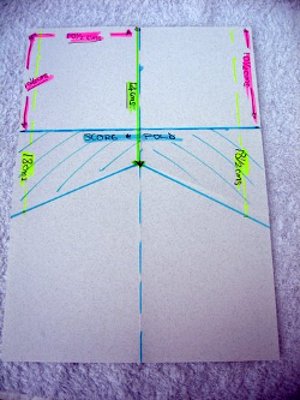
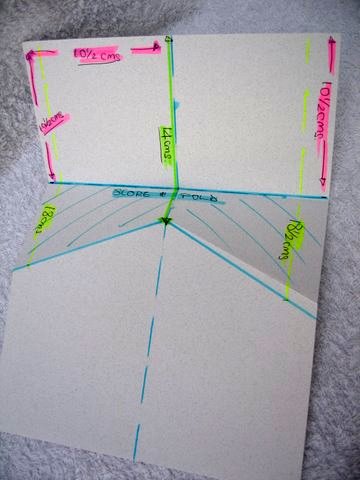
For the purposes of the diagram, and to show you clearly where to measure, score and fold, I have used coloured marker pens.
You can also do this on your practise card, and then keep it safe, for future reference. Store it in plastic wallet and keep it with your sketches.
From the top of the card measure down 10.5cms (4 1/4ins), on each side. The Pink line.
I have joined these two marks in Blue. Score and fold the card.
The Pink line shows you that you will now have two 10.5cms (4 1/4ins) squares at the top of the card.
On the centre fold measure down 14cms (5 1/2ins). TheGreen line.
On each outer side measure 18cms (7 1/4ins). The Yellowline
From the centre (14cms mark), to the outer edge (18cms marks), score a line, so that you have an horizontal "K" shape, as the shaded blue area shows you.
Are you still with me so far? Good, then let's continue.
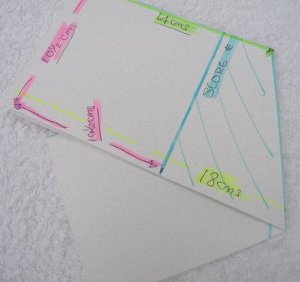
The K lines need to be scored and folded sharply to allow the diamond to form.
So close the card lengthways, and along the two blue "K" lines score and fold to give a sharp crease, then do it the other way as well.
So just to recap....
Measure as the coloured lines show, and score and fold along all the blue lines.
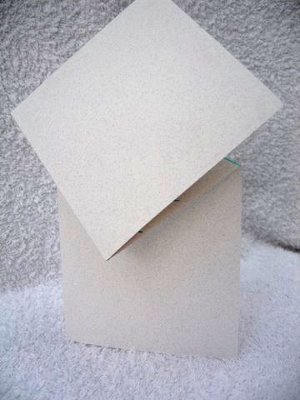
As you bend the top fold, push the K fold in at the centre and the outer sloping lines and the card will now fold into the diamond shape you want
Once you feel confident enough to make these Diamond top cards on your good quality card stock, then obviously you won't have coloured lines all over it.
The marks you make will be feint, and can be erased before you start to decorate it.
Then use your iamgination to embellish the card any way you want to. People will be amazed at your creativity and you will glow at the praise.
And remember to add
"Handmade by....your name...." on the back
Magic!
Shaped cards
Easy cardmaking projects
More cardmaking projects
Papercrafts
Novelty Cards
Kinetic Cards
Ideas
Return from Diamond top cards to Homepage

Recent Articles
-
Memory Book
Oct 15, 22 09:17 AM
Make a memory book, fun to make and even lovelier to give. -
Die cut letters.
Jul 19, 21 10:12 AM
Add that personal touch with die cut letters, add names or sentiment as you please. -
Diaper Fold Card.
Jul 19, 21 09:34 AM
Create this fun Diaper Fold Card...and no need for a pin!
Search


