Pink tilt card
by Jacqueline
(Spain)
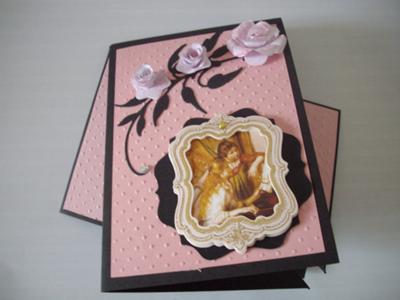
I made this card after watching the video of Christina making it. I also thought that I would just keep it to two colours pink and black.
The two little girls were a Christmas present of card making toppers from one of my daughters so I will give this to her when it is her birthday.
I love trying out new card designs so love Christina's designs and ideas.
Christina says ...
The Tilt Card was such an easy concept and yet it has proved to be a very popular fold.
The colours used here are amongst my favourites but the design can be used just as well for any of your male themed cards.
There are many more folds and ideas for you in the Easy projects and some fo them are also in Video Tutorials.
You will find much more in the NavBar to your left so why not make a cuppa and have a browse around.
Click here to read or post comments
jrosecat from Spain
by Jacqueline
(Spain)
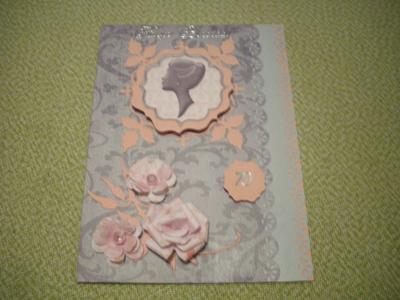
This card was made for a friend who will be 70 this year. Using backing paper and topper from Card making magazine.
I used an A4 white card folded in half, cut a strip of grey card and used a punch to edge it.
Behind this I stuck a strip of pink. I then used the same punch again to edge it the same as the grey card and fixed them both to the front of the white card.
I then used a decorative die in pink card and fixed this to the front.
For the topper I mounted this onto another part of the die and used pads to raise it.
I have made 3 flowers for the corner.
Christina says ...
What a lovely combination pink and grey are, especailly for all your girly cards.
And girls of any age will just love this. I am sure your friend will feel really special when she gets her card.
The flowers in the corner always finish a card for me as I love adding them to my cards too.
There are several ways to create flowers and you can find many of them in Video Tutorials in the NavBar to your left.
Click here to read or post comments
Triplet card
by Jacqueline
(Spain)
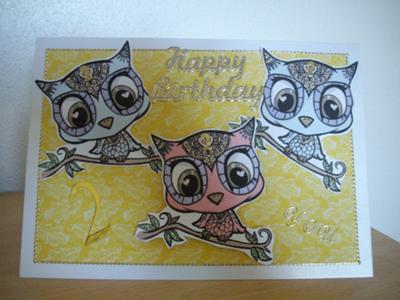
This is the 3rd card I have made for the triplets, the first was for when they were born (3 prams)and then the first birthday (3 dinosaurs with balloons) and now the second birthday.
I love a challenge and this is definitely one.
I folded an A4 card in half first then found an owl on Google images which I printed onto thin card and coloured in with my new Pro Markers!!
2 in blue and 1 in pink (good job I photograph them so that I remember what sex they are!!
I printed off the backing paper from paperprintables.com. The owls are then stuck down with good glue and the middle one was fixed with silicone to raise it slightly.
I have also put some glossy accent on the eyes. I cut out slightly away from the edge of the owls to make it easier for myself.
Finished off with peel off around the border, a happy birthday, and with the large 2 and You the other side.
Also put a small number 2 on each owl. Hope you like it!!
Goodness knows what I will do next year!!
Christina says ...
What a lovely idea this is and for such a special occasion as a birthday... and triplets too.
Would love to see what you do when they are 18 ... the mind boggles at that one!!
The owls are super cute and Decoupage is always very popular. I am sure that the triplets mum would have been delighted with this card.
Paper Printables have some lovely papers and they are all FREE and you will find a direct link to their website in the Resources page
Click here to read or post comments
Knickers!!
by Jacqueline
(Spain)
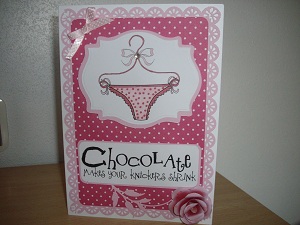
I found this on the internet and downloaded the digital sketch, not sure where I got it from though!!
I have a neighbours birthday this week and thought she would find it funny (I hope!!)
I folded an A4 card in half and then used pink card which I then punched all the way around with a border punch.
The backing paper was from a card making magazine with dots on which then gave me the idea to put dots on the knickers!!
I used pink as the complete theme for this card. I used pro markers to colour in. Finishing it off with a dotty pink ribbon,and a rose that I had made before.
The sentiment came with the download and on the inside I put the rest of the sentiment saying "who needs knickers"
Christina says ...
Well they don't come much more girly than that ...
What a fabulous card and I am sure your friend will be delighted with it.
The theme, the spots and the colours all work so well together ... and I love the sentiment on the front of the card.
Click here to read or post comments
Ballerinas
by Jacqueline
(Spain)
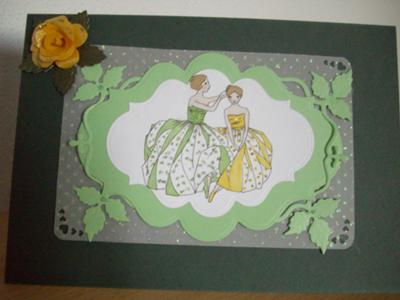
I subscribe to a digital card site and the competition was for a green theme so this was my entry. (First time of entering!!)
Main card folded in half and using Spellbinder Label 20, I printed the ladies onto a white card and coloured them in with Promarkers.
I then cut out the next size and mounted the white onto this and using another die cut which I cut in half and placed this behind.
They were then mounted onto some backing paper that has glitter on it, put a yellow rose in the corner that I had made and put some glitter on the dresses.
Christina says ...
Don't you just love Spellbinders??? The cards are fantastic and I love the Ballerinas on them Jacqueline.
The whole theme is set off with the Labels 20 dies and making a card with these dies is just a guarantee of success.
If you are a Newbie to card making and would like to make cards as lovely as Jacqueline then take a look at the Tutorials especailly for Spellbinders in the Tutorials section in the NavBar to your left.
Click here to read or post comments
Just chilling
by Jacqueline
(Spain)
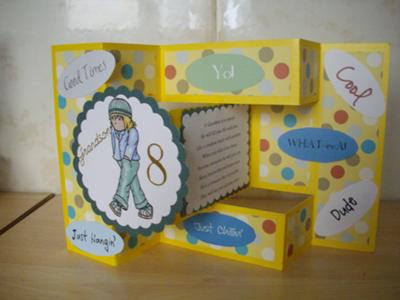
Another grandson's birthday (I have 6 !!) this is for one who is a bit younger. It should suit him down to the ground!!
The card is one that you did Christina and the backing paper and image are from a CD.
Christina says ...
Many people think that CD crafting is a cheat because everything is there for you.... but the talent comes in deciding which to print off and how to put the card together.
The use of colour and folds and the embellishments that are added can make each card indivdual and uniquely your own.
If two people were to use the same CD then they would create completely different looks to their cards and each time you make a card it will be different in some way.
So have a go at using some CD's as there are some really lovely ones around and they will help you to expand your crafting talents.
This fold is featured in the Kinetic Cards and is the Shutter Card
All the instructions and measurements are there and are easy to follow.
Click here to read or post comments
Simpsons
by Jacqueline
(Spain)
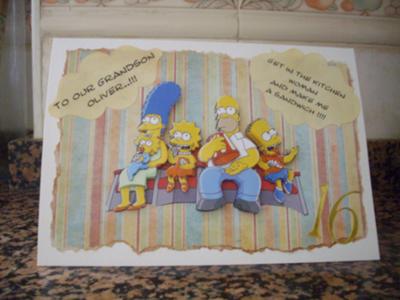
This card was made for my grandson in Australia, he has a great sense of humour and will be 16 soon.
He likes the Simpson's and one his favourite sayings is "get in the kitchen woman and make me a sandwich" so have incorporated both!!
Found an image via Google and printed it off 4 times to make a decoupage of it, with the backing paper.
I ripped around the edges and distressed it with chalks, put it all onto an A4 card and then typed in the saying, sized it to fit and used Spellbinder around it.
The Spellbinder was to big so cut one side first and then moved it up slightly to cut the other side, not something I have done before but it seems to have worked!!
Christina says ...
The card is so much fun and I am sure that your grandson is going to love it.
There are many free images on the internet and to print off lots as Jacqueline has done is an excellent way to build up the decoupage.
The use of the Spellbinders is good and there are lots of ways in which you can use these wonderful dies.
Now don't get me started on Spellbinders or I will never shut up.... I just love them ... all!
Click here to read or post comments
Dotty
by Jacqueline
(Spain)
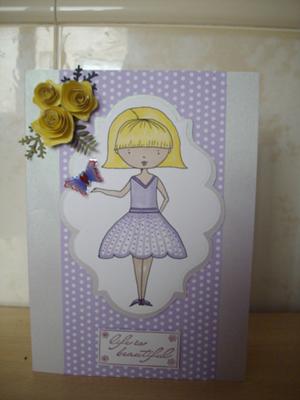
Another card that I entered for a digital competition on the cdac site. http://priscillastyles.ning.com/ image provided by back to back paper.
I coloured it in with Promarkers after printing it onto white card. The image was cut out using Spellbinders Labels 20
I drew around the shape again on light purple card and cut this out carefully with my bladed knife. The spotty paper was from my card making magazine.
The image was padded onto the card and then finished off with yellow flowers and a little butterfly coming from her hand. The sentiment was stamped onto white card with lilac ink.
Christina says ...
Well hello Dotty, and doesn't she make a very pretty centre piece for your card.
I love the Labels 20 and use it a lot on my cards and the technique with the Faux Nesties is explained fully in the Techniques section in the NavBar to your left.
It really helps to extend the sizes and usage of any label die that you have.
The colours you have used here are very soft and I love the pastel shades that are comingin again for the Spring seaon.
And the flowers .... well what can I say about adding flowers to a card. Gorgeous!!
They just make into something really special for me, along with the ribbons and the pearls ... which is why I called my new Blog
Flowers, Ribbons and Pearls and I do hope you will visit and join the band of followers.
Click here to read or post comments
Triplets 3rd birthday
by Jacqueline
(Spain)
This is the 4th time I have made a card for the triplets, the first being the birth and once again my friend has asked me to make their birthday card. This challenge is getting harder each year!!
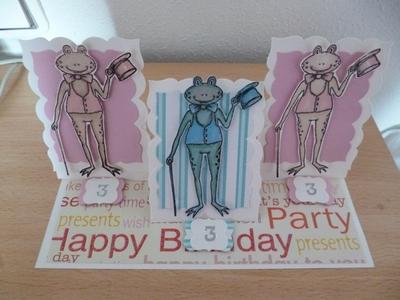
This time I decided to do a triple easel card and bought a stamp from Ollie Doodles here in Spain where I go to card class. I coloured one blue and two pink and cut them out.
I then matted and layered them up and using happy birthday card that I had in among my store stash as the base I cut out using a Spellbinder to mount them on.
Christina says ...
Very pretty card and I am sure that the recipient will love it... and it combines a card for all three by using the different colour schemes.
I can't beleive it is three years since you add the card for their birth ... how time flies.
Easel Cards are so pretty and there are tutorials on how to make them from the single style right up to the Quad Ease.
If you would like to make one of these for your self as Jacqueline has done then pop across to the Video Tutorials in the NavBar to your left.
Click here to read or post comments
New House
by Jacqueline
(Spain)
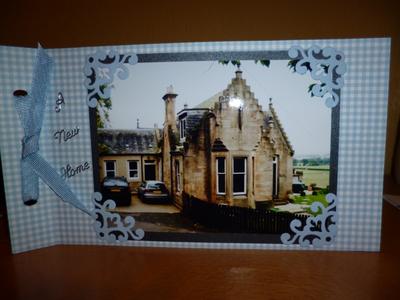
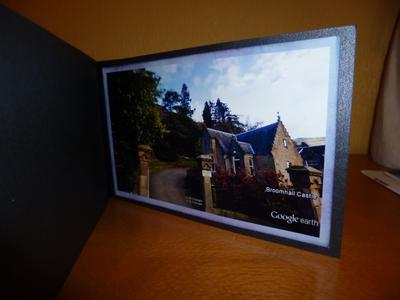
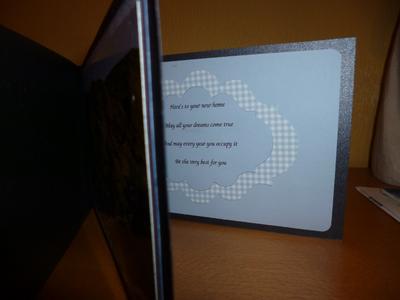
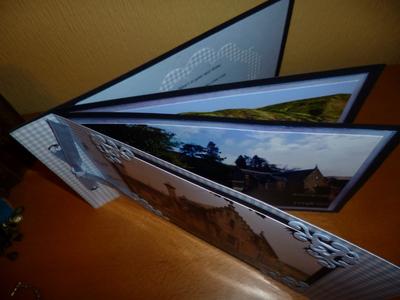
This was one I had to make for a gentleman who asked if someone in our class would make a card using the photos he had of the house.
Of course me and my impulsive nature said yes I will make one not realising what it entailed!! With a little bit of inspiration from Carol who takes the class I decided to make a book.
Drawing from the colours I decided on the colour blue. Using gingham pale blue paper and dark blue as a contrast and using Spellbinders labels this is the finished article.
Christina says ...
This is a wonderful project and so personal to the recipient. It will be something that is treasured for a long time ... and what a fabulous house too.
Click here to read or post comments
Priscillastyle card umbrella
by Jacqueline
(Spain)
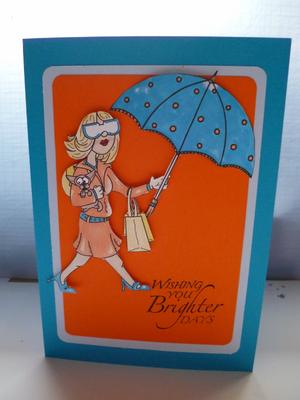
An entry for CDAC progressive challenge with Priscillstyles.
The umbrella was the entry digital and I used another one that I had on my computer to make the design that I wanted.
Coloured with alcohol pens and then cut out. Matted and layered using bright colours and then I stamped a sentiment.
Christina says ...
Very bright and cheerful card and I hope you won the challenge with it.
Click here to read or post comments
Family Christmas card
by Jacqueline
(Spain)
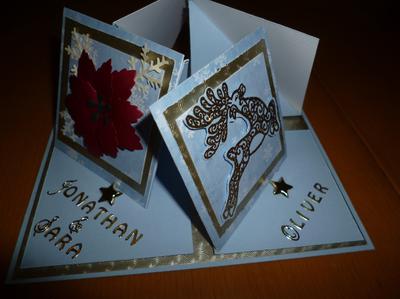
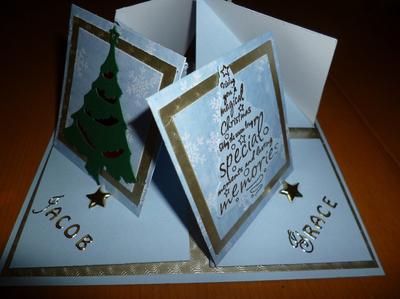
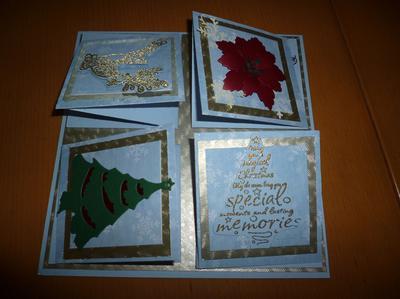
Family quad card
I have always liked this quad easel card that you made Christina so thought that I would like to make it for my daughter and her family who live in Australia.
For the base I used pale blue card 18 x 18, then mated gold card 17.5 x 17.5 I then matted pale blue onto this. I made up the four corners with different designs matting and layering with blue snowflake card and gold card.
Before I fixed the corners to the base I made a hole in each card and fixed a star brad and then put foam pads to lift it slightly before fixing it all together. I used peel off's to make the names of each grandchild and my daughter and son in laws name so they each have their own corner.
Thank you Christina for your lovely idea.x
Christina says ...
This is a card that looks much more complicated than it is and the finished result is very unusual.
It is also one that is sure to get some comments from who ever is lucky enough to get one of your creations.
What a lovely idea to give each family member a corner for them selves and add different designs for each part.
The only problem now is they will argue over which corner should be on display. They will have to take it in turns each day to have their name on show.
If you would like to try making it as Jacqueline has done then you will find the video tutorial in the NavBar to your left ... Quad Easel Card
Have fun with it and don't forget to add your card photos to the Gallery pages just like Jacqueline.
Click here to read or post comments

Recent Articles
-
Memory Book
Oct 15, 22 09:17 AM
Make a memory book, fun to make and even lovelier to give. -
Die cut letters.
Jul 19, 21 10:12 AM
Add that personal touch with die cut letters, add names or sentiment as you please. -
Diaper Fold Card.
Jul 19, 21 09:34 AM
Create this fun Diaper Fold Card...and no need for a pin!
Search

