Tealight Candle Card ...
to brighten someones day
This Tealight Candle Card makes a lovely gift for someone special and doesn't cost the earth to make it
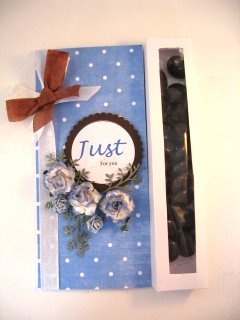
When you want to give something that is a little more than just a card then this is one idea you may want to try.
The tealight candle card is very easy to do and the tealights used are cheap to buy.
The ones used in this card smell of roses and so those are the flowers that I have added to the front of the card.
The whole effect is very feminine and smells gorgeous too.
I have used a larger sized card that is 14 x 14 inches square for this and you I bought mine from Crafters Companion
I have done the project in inches.
If you prefer to learn by watching then you will also find Video Tutorial.
Step 1
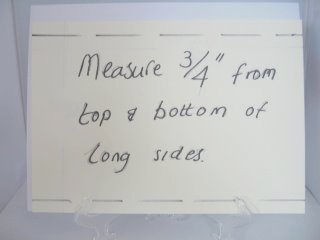
Cut your card down to 9" x 12" and across the top and bottom of the long sides measure in 3/4"
I would advise you to make a template as a practise run first and then keep this to one side for future reference.
You can make all the marks and measurements on this first to get the idea of what to do, before you start on your good stuff.
Step 2
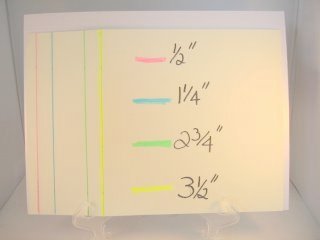
With the good side of the card face down, from the left hand, short edge start your measurements
I have used coloured pens to highlight them so they are easier to read.
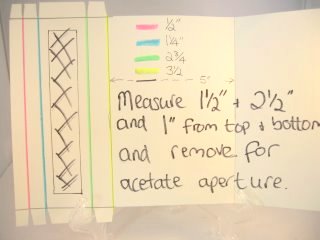
Measure and score at 1/2" ... 1 1/4"... 2 3/4"... 3 1/2"
All these need to be folded and scored to give a sharp crease in the card.
Step 3
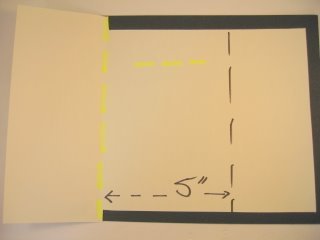
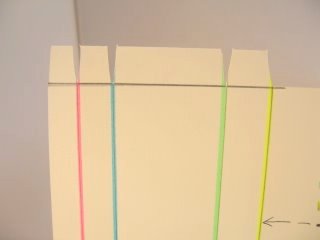
From the folded yellow line at 3 1/2" measure again at 5" and score and fold inwards.
Remove the the 3/4" strips from the top and bottom of the card, from the 3 1/2" mark to the right hand edge.
Your card should now look like the one in the photograph
Step 4
On each of the scored and folded lines cut down to the 3/4" mark and take a small triangle out of each side as shown.
This makes it easier for the box tabs to close inwards.
You should now be able to see clearly how the card will close to form the channel for the tealights
Step 5
The next part is to measure again from the left side of the card, between the second and third score lines.
Mark the card at 1 1/2" and 2 1/2" and about 1/2" from the 3/4 score line at each end.
The hatched marks show you which part you will need to remove
This is where you will add the acetate to make the window for your tealight candle card.
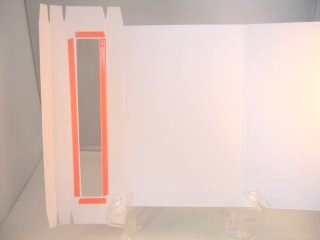
You should now have a window that is about one inch wide in the centre of the channel......Yes? Oh good!!!
Step 6
Add a strong, thin double side tape around the opening, on the wrong side, and fix the acetate into the aperture, so that it is inside the channel for the tea lights.
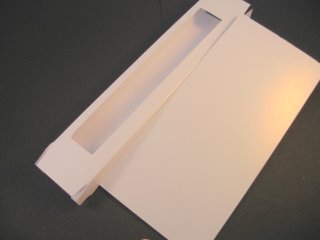
On the good side of the last strip add some wet glue. This will be folded inwards to close the channel.
Step 7
Now carefully fold this channel in and glue it in place making sure that you don't glue the open edge of what will be the card as well.
Step 8
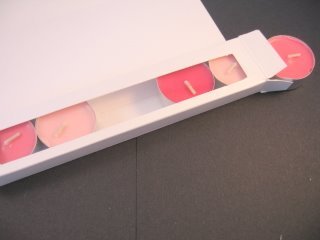
Add the tealights to the channel and fold each end closed and glue in place with a little wet glue.
Now comes the fun part where you can decorate the card up to suit the recipient.
You can use the card any way round as it suits you.
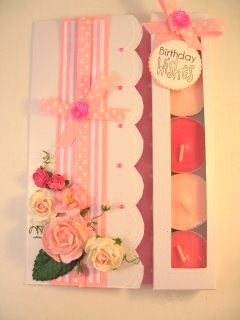
Mine are all for female friends and so I have made them as pretty as I can.
And the beautiful aroma from this card is Strawberries
Mmm Mmmmmm !!!
I hope you have fun making your own Tealight candle card and that your friends will be delighted with their gifts.
Easy Cardmaking Projects
More Projects
Kinetic Cards
Novelty Cards
Papercrafts
Cardmaking Tutorials
Return from Tealight Candle Card to Homepage

Recent Articles
-
Memory Book
Oct 15, 22 09:17 AM
Make a memory book, fun to make and even lovelier to give. -
Die cut letters.
Jul 19, 21 10:12 AM
Add that personal touch with die cut letters, add names or sentiment as you please. -
Diaper Fold Card.
Jul 19, 21 09:34 AM
Create this fun Diaper Fold Card...and no need for a pin!
Search


